Sunday, January 5, 2020

Tatting Shuttles

Tatting shuttles come in two basic types - bobbin or post shuttles. Then you can decide what the tip should be - crochet hook, pick, or nothing.


Bobbin vs Post
Bobbin vs post shuttles refers to what the thread attaches to at the center of the shuttle. Bobbins will rotate around to release thread whereas you will have to unwind thread from around the post in a post shuttle. 

Deciding what shuttle you like is a personal preference. I've found most people I've met prefer post shuttles, but if you like a bobbin shuttle you really like bobbin shuttles. I find the bobbin doesn't let me tension right as I like to pull my thread really hard. I think this is a fairly common comment on the bobbin shuttles. That being said, the person who taught me loves bobbin shuttles. In general, bobbing shuttles hold less thread but you can change out bobbins easily allowing you to own multiple bobbin for your shuttle (vs owning multiple post shuttles if you need to change projects or colors).

My advise to a beginner would be to try a post shuttle first. If your heart is set on a bobbin shuttle, then try that.


Shuttle tip options:
The tip of the shuttle is your other option (you can find bobbin and post shuttles with all these tip options): crochet hook, pick/spike/point, or nothing/plain (both ends are the same). Traditional tatting shuttles were the same on both ends, without any hooks or picks added. Modern shuttles often have a crochet hook or pick. These are used to pick up threads, adjust your work, and unpick mistakes.

I always use a crochet hook to pull my thread through a picot and many love the option of the hook being attached their shuttle already. I learned to tat on the clover shuttles with picks so I prefer the option to have a pick so I can use it to adjust my work quickly. I use my pick all the time and miss it when I am using a different shuttle. As I still need a crochet hook, I always carry one in my tatting bag to pull my threads through a picot or to open a closed ring.


If you are buying your first shuttle, I suggest the small Clover post shuttles. The Clover one is a post shuttle with a pick. These are my personal favorite and what I would tell a beginner to try first. They are a good shuttle, easy to find (Joann fabrics in store by the crochet hooks; online - Tatting Corner, Handy Hands, Joann, and Amazon), and they are relatively inexpensive. Be sure to buy the name brand Clover ones that are made in Japan. There are many cheap knockoffs but their picks are never sharp enough to work.

Those who like bobbin shuttles usually like the Airlit. It is a bobbin shuttle with a crochet hook on the end. Again it is easy to find (hobby lobby carries it in addition to the online stores mentioned before) and relatively inexpensive. Handy Hands makes the Airlit and more information can be found on their website. I am not a bobbin person, so I've given most of bobbin shuttles away.

I usually buy the largest pack of the Clover post shuttles I can find (there was a 5 pack in small and large but they are being discontinued in the USA as of 2019). I also buy the large Clover post shuttles for bigger projects. If I need an even bigger shuttle, I use the Starlit but it is not my favorite (Clover please make an XL post shuttle for me!). The Starlit's pick doesn't work well for me so I have to use something else to pick with, but the Starlit can hold much more thread and/or beads than the Clovers. The Starlit is available at Hobby Lobby too, which is very convenient for me.

The largest commercial shuttle I've seen is the Tatsy shuttle (post shuttle). I find it so large that it is cumbersome. Though, if you want to tat with yarn, this is the shuttle you'll need!

Note - there is a new shuttle as of 2019 that is an attempt to be a post shuttle with a removable bobbin called the Dreamlit by Handy Hands. In this shuttle, the bobbin is removable but it does not rotate on the shuttle, thus eliminating the issues I had with bobbin shuttles. I've bought a couple but haven't used them much since I prefer a pick to a crochet hook end (probably because I learned on a pick shuttle).


If this is too much information - for a beginner, get the small Clover post shuttles. Joann sells them in store or look on Amazon.

Thursday, December 19, 2019

Lizbeth Tatting Thread Sizes

Almost all my tatting is done with Lizbeth threads. Lizbeth is available in a wide variety of colors and sizes. The sizes currently available, from small to large, are 80, 40, 20, 10, and 3.

To illustrate the size difference, I have tatted up the same butterfly pattern in every size of Lizbeth thread (from left to right is 80, 40, 20, 10, and 3)


I find size 3 too large, but good for small motifs and to teach on initially. Size 3 makes seeing the stitches very easy but its very bulky and cumbersome to keep advancing your thread. Once a student can do a couple stitches on size 3, I then immediately move them to size 10 thread. Size 10 is then what I would send them home with to practice on. Size 10 is my favorite but only available online where I am. Most of my tatting is done in size 10 (occasionally I will use size 20 or size 3, but this is highly project specific).

Size 20 is very common and easily available in limited colors at Hobby Lobby. I don't go beyond size 20 because it is too small for me, but many tatters do. Traditionally, tatting was done in super fine thread so going beyond size 20 is common.

Handy Hands (the maker of Lizbeth threads) will usually provide catalog upon request and mine came with a small sample threads. Test them out and find your own preference!


Lizbeth thread can be found for sale at:
Tatting Corner
Handy Hands
Amazon sometimes has select colors and sizes, often at higher than list price
Hobby Lobby sells limited colors in size 3 and 20


Size chart with yardage on the ball (price current as of 2019):
  • Size 3 = 50 grams, approx. 120 yds - $6.25 each
  • Size 10 = 25 grams, approx. 122 yds - $4.25 each
  • Size 20 = 25 grams, approx. 210 yds - $4.25 each
  • Size 40 = 25 grams, approx 300 yds - $4.50 each
  • Size 80 = 10 grams, approx. 184 yds - $3.10 each


From the manufacturer, Handy Hands:
100% Egyptian Cotton Exceptional High Quality cordonnet thread with a large assortment of colors! Handy Hands, Inc., U.S. seller of tatting supplies and books, combined forces with an international thread manufacturer to develop this exceptional imported line of cotton thread, designed especially for tatters, crocheters, knitters and hand-crafters of all persuasions. 
Choose from over 201 colors in size 10, 20, 40 and 80. In size 3 there are 100 colors to choose from. Lizbeth thread is a 6-cord cordonnet, shiny, has rich and vibrant color. The thread is super-combed and gas-singed for outstanding body, mercerized and color fast. Color is uniform throughout. Made to Handy Hands' high standard of quality.

Please note that I use the cotton Lizbeth thread. There is a metallic version, but this tats up differently and is not 100% cotton.

I have one ball of the Lizbeth Twirlz but I haven't used it yet. I have been warned it is harder to see your stitches in this thread, so I would not give it to a new student.

I have also tatted with silk thread, pearl cotton, silk yarn, among others. Lizbeth thread is by far my favorite.

Tuesday, November 12, 2019

Unfolding Pouch


I just finished up a new pouch and wanted to share. It is the DIY Unfolding Pouch and the full free tutorial is on YouTube (a fair warning, there are limited verbal instructions so a basic understanding of sewing bags is probably required). Regardless, I thought it was a great tutorial and had no problem making my own bag! I absolutely love how the bag opens and lays flat but then has a full zipper so no small items will be lost. I have seen bags that fold up before, but usually there are some small gaps where a crochet hook or the like could escape.

Like normal, I altered the tutorial to omit all interfacing. For the main body of the bag, I added a layer of quilting cotton and then quilted the three layers (outside fabric, batting, and inside fabric) together after installing the zipper. I cut the sides of the inside large so I could trim after quilting (the parts that the zipper attach to must be cut accurately though). The side panels are just quilting cotton, though I think a canvas would go great there too.

Also, Joann fabrics just got some new Harry Potter fabric in, so expect to see some new things here and on Instagram as I get a chance to make them. I would also like to thank my new online friend who messaged me to keep an eye out for these new fabrics! I was able to snag them pretty much as soon as they arrived earlier this month as a result!


Monday, August 26, 2019

Lino cut printing


On Saturday I tried something new - linoleum cut printing. I was so nice to be student and have a whole kit and lesson planned for you! The workshop was held at Abode Studios and taught by Sarah. Check out Abode's calendar for more upcoming events!

All the supplies were provided and a sample image was given, though you could bring in or draw your own image. I had a rough idea of my plan and then set to executing it. Once our blocks were craved, we learned how to print onto paper.


At home, I knew this had to go onto fabric. I love my print and will hang it on the wall, but we all know my love of fabric runs deeper. Just think of the possibilities - printing my own images on fabrics!

There are special fabric block printing inks, but that involves waiting for it to arrive from online. So I dug out my acrylic paints and tried those. While I cannot get a full coverage image without the paint running into crack, it wasn't a complete failure. I now have my own lino print zippered pouch!

The fabric used is 6 oz Ron-Loc canvas in natural. It was prewashed before use (I've found the natural fabrics often have lots of residue left on them). This is lighter than the normal duck canvas I use, but I didn't want that level of stiffness for this pouch.

As a side note - the proper block printing fabric ink arrives tomorrow...


Supplies used:
- Speedball speedy carve
- block carving tool set
- Speedball brayer
- Cranfield Caligo Safe Wash Relief Ink in black (what we used in class)
- Speedball block printing fabric ink (on order to try)
- acrylic paint (the cheap stuff from the craft store or Wal-Mart, as that's what we had at home)

There is also a Speedball block printing starter kit available. I haven't bought it, but it may be worthwhile if you want to give block printing a try!

And, as always, check out my Instagram for more pictures and faster updates on what I'm up to!


After getting some acrylic paint questions, I wanted to share what I've learned. Regular, cheap acrylic paint seems to do well for me on fabric (I've done cotton t shirts and cotton canvas) IF diluted with water. If you don't dilute it, it goes on very thick and will likely crack when the material is bent. I add a little water at a time and test until the desired level is reached. I want it go on easily with a paint brush in one layer. Too much water and the paint will run on fabric. Test on scraps first. Because you're diluting the paint, it's hard to make it as dark and vivid as it would be on paper. For example black usually ends up a dark grey after repeated washing. (Note - I did not dilute the paint for block printing though. I wanted it thicker here to try to get fully coverage of the image.)

They sell a fabric additive for acrylic paint but I've never bought it. My painted t shirt has held up fine with washing and drying without it.

To get fine lines, I use a fine tip applicator bottle. It is imperative you dilute the paint with water until you get a good flow (test on a scrap). The paint cannot have glitter or any lumps as it will clog the bottle. Replace the pin when not in use and promptly clean out the bottle when done. I've left paint for a few days in it, but not much longer. When cleaning, unscrew all the parts and thoroughly clean.

When you fabric is dry, cover with a pressing cloth and iron to heat set the paint. I have had some transfer when ironing so ensure you use a pressing cloth (I use an old flour sack towel). If the fabric is not fully dry, expect more transfer to occur.


Please note that this blog utilizes Amazon affiliate links. Purchasing directly through these Amazon links will not cost you anything, but will earn me a commission. More about my Amazon Associate account can be found here. Thank you for your support!

All opinions are my own. I have used or purchased all the items listed unless otherwise noted. 

Saturday, May 25, 2019

Favorite Notions

I have a few favorite sewing notions to share. If you attended a sewing class of mine, you were able to see these in actions and hopefully understand why they are amazing!


Clover Wonder Clips
These clips are truly wonderful when it comes to making 3-dimensional objects. They are easy to use, hold you pieces together well, and can't poke you! They are also a great aid in putting on binding. While they can't fully replace straight pins, I use them far more often than pins. For bag making I suggest a 50 pack (plenty to make a bag and they come in a little box):

This is my favorite fabric marking utensil. It is easy to use and give a nice white line that is easily dusted off. They make them in other colors, but I found the yellow does not come off as easily so I avoid using it. I have not tried any of the additional colors.


These are an affordable, good quality, assortment of fabric pencils. The pack has blue, white, and pink which are enough colors to work on most any fabric. When my white chaco liner won't work on the fabric, I grab my blue or pink pencil!


I have linked to the exact cutter that I own. It is my absolute favorite since I can use it in either hand. I have yet to see a rotary cutter that I love more than mine.

I have found these are the easiest rulers for me to see through. They come in variety of sizes and I own multiples of most. Locally they are available at Michael's and select large Joann stores. Here are the Amazon links to some of my favorite sizes:
  • 6.5" by 6.5" - if you do a lot of squares, this is a great ruler
  • 6" by 12" - this would be the second size I would suggest getting
  • 6" by 24" - if you can only buy one size, this is the most useful


Please note that this blog utilizes Amazon affiliate links. Purchasing directly through these Amazon links will not cost you anything, but will earn me a commission. More about my Amazon Associate account can be found here. Thank you for your support!

I have purchased all these items on my own and the opinions offered are mine.


Cotton Batting

I use 100% cotton batting in all my bags and classes. While this used to be easy to find in stores, this has become increasingly difficult recently. My suggestion now would be to look online at craft stores or Amazon. As I am an Amazon Associate, I will link to the products there for simplicity's sake.


My absolute favorite batting is Warm and Plush by the Warm Company. It is 100% cotton, without scrim, and has a good loft. Because it does not have a scrim, you must densely quilt it with your quilting lines being no more than 6" apart per the package instructions. I have made bags and quilts that I densely quilt and it has held up beautifully for me. It can be a little hard to find though.

My second choice, is Warm 100 by the Warm Company (this is the batting used in the bag making class). Again all cotton, but with a cotton scrim (package says you can quilt up to 10" apart). Warm 100 is thinner than Warm and Plush, so this can advantageous in some projects. In general though, I prefer the loftier Warm and Plush.

Warm & Natural, also by the Warm Company, can work in a pinch, but it has a synthetic scrim if you read the fiber content label carefully (my packages reads natural cotton 87.5%, polypropylene 12.5%). This is one of the most common batting available and very easy to find in stores. Because of the scrim, the package says you can quilt up to 10" apart. It has the same low loft as Warm 100.


I'm sure there are other amazing 100% cotton batting, but these are the only ones I've tried. I have ordered from Organic Cotton Plus before, and would highly recommend checking out their batting options too (but I have never personally tried their battings).


Please note that this blog utilizes Amazon affiliate links. Purchasing directly through these Amazon links will not cost you anything, but will earn me a commission. More about my Amazon Associate account can be found here. Thank you for your support!

I have purchased these battings on my own and the opinions offered are mine.


Zipper Recommendations

There are two main types of zippers I use: closed and coil separating. The closed zippers are a fixed length, but can be cut shorter. They have smaller teeth and are used in smaller bags. The coil separating are a separating zipper, meaning the bottom isn't closed but can be opened and separated (think of the bottom on a jacket/coat zipper). These are larger zippers and are much more expensive. As such, they are best on larger bag and purses.


I buy my closed zippers in bulk online from ZipperStop on Amazon (I have never had any issues with this vendor and they are USA based). I get YKK size #3 from them. There are a variety of packages I've bought before:
Please make sure the vendor from Amazon is ZipperStop. I haven't tried other vendors, so I cannot comment on their quality of zippers or service.


I have yet to find a good bulk source for coil separating zippers. The ones I like best are the Coats and Clarke ones from Joann. They come in a variety of lengths and colors. I find I use the 12" and 18" the most:


I also really like the purse zippers by Coats and Clarke at Joann. They were not used in a bag class, but I have used them in the Bionic Gear Bag and Sew Together Bag patterns before. I get the 22" length ones.


Please note that this blog utilizes Amazon affiliate links. Purchasing directly through these Amazon links will not cost you anything, but will earn me a commission. More about my Amazon Associate account can be found here. Thank you for your support!

I have purchased these zippers on my own and the opinions offered are mine. I am not an affiliate with Joann.


Book Recommendations

I have been asked about what sewing books I recommend. These are my favorite as of May 2019:

School of Sewing: Learn it. Teach it. Sew Together. By Shea Anderson.
This is an excellent learn-to-sew book. My favorites are the first two projects and the last one (French seamed pillowcase, drawstring bag, and the quilt). I have not only made mutliples of these three projects, but I've taught people of all ages how to do these! The pillowcase is a great project to teach to children. Every child that I've helped has immediately wanted to put their pillowcase on their bed (I have to remind them to wash it first though!).


Stitched Sewing Organizers: Pretty Cases, Boxes, Pouches, Pincushions & More. By Aneela Hoey.
This is a great little book of bags and pouch patterns. While I disagree about the use of interfacing and vinyl, you can easily avoid these patterns or swap out interfacing with quilting the parts. My favorite bag is the Triple Pouch. Here, I quilted the two exterior pieces and just used regular quilting cotton for the rest of the bag without interfacing. I've made multiple pouches using this method without any problems.


The Bag Making Bible: The Complete Guide to Sewing and Customizing Your Own Unique Bags. By Lisa Lam.
This is an excellent book of bag making techniques. Again, I avoid some supplies but this covers a wide variety of techniques and is a great reference tool.


Fussy Cutters Club: A Boot Camp for Mastering Fabric Play - 14 Projects. By Angie Wilson.
This book is a wonderful guide into the world of fussy cutting for patchwork. Fussing cutting is the process of cutting your fabric with respect to the print images on it. This is how you can center that cute animal in the middle of a square. I seem to always fussy cut since image placement is important to me. If you want to get started fussy cutting, this is an excellent place to start!


Adventures in Paper Piecing & Design: A Quilter’s Guide with Design Exercises, Step-by-Step Instructions & Patterns to Get You Sewing. By Sarah Elizabeth Sharp.
Paper piecing is an advanced patchwork technique that gives amazing results. You can create extremely detailed images using this method. I have referenced Fandom in Stitches before and these patterns are all paper pieced. If you want a book that goes into detail about paper piecing, this is the one!


Please note that this blog utilizes Amazon affiliate links. Purchasing directly through these Amazon links will not cost you anything, but will earn me a commission. More about my Amazon Associate account can be found here. Thank you for your support!

I have purchased these books on my own and the opinions offered are mine.

And as a reminder, you can check out your local library for these books! Unless they are currently checked out, I know my local library has these on the shelf!


My Sewing Machine

I have received a number of questions about what sewing machine I use. I bought a Brother cs6000i in September 3, 2015 from Amazon (thank you order history for knowing the exact date!) and have used it exclusively since then. The machine, as of this writing, is only about $2 more than what I paid for it, making it a steal.

My machine came with everything you have seen me use at the sewing workshops including, but not limited to, multiple feet (including a walking foot, free motion foot, and button hole maker), the extended working table attachment, automatic needle threader, and a hard cover (that I never carry around). I am a heavy user of my sewing machine, and it has held up beautifully.

This machine consistently gets good reviews, comes with a bunch of accessories, and is affordable. The tools are what you make of them. You do not need a fancy, expensive machine to make wonderful creations. You do, however, need to practice and experiment to achieve the results you want. Also change that sewing needle if its giving you issues!

Happy Sewing!


Please note that this blog utilizes Amazon Associate links. Purchasing directly through these Amazon affiliate links will not cost you anything, but will earn me a commission. More about my Amazon Associate account can be found here. Thank you for your support!

I purchased my sewing machine on my own in 2015 and the opinions offered are my own.


Wednesday, January 30, 2019

Hermione's Purple Beaded Bag


I have been wanting to make an accurate version of Hermione's Beaded Bag for a while now. The books do not lend too much insight into the bag, other than it is small, purple, beaded, and can fit down a sock.


I started by sewing a purple bag (without beads for simplicity's sake). The pattern is free by Sew4Home and called the 8-Pocket Jewelry Pouch. I made my bag using two fat quarters, some twill tape, and a scrap of cotton batting in the base. It was super fun make and very cute bag. Incidentally, my tatting friends pointed out it would make an excellent tatting bag and people actually sell a similar bag for tatting supplies. If you can sew, this is an easy and fast make. The longest part was figuring out how to do a button hole on my machine (Interestingly, I have never used this function before despite having my machine for about 4 years now)!

While I like this bag, I don't think it would fit down a sock easily. It is, however, great for storing necklaces in the 8 pockets and a few cuff bracelets in the middle!


I then decided it may be best to knit a bag. After looking for a pattern and not finding one to my satisfaction, I drafted a pattern and set to work. My Purple Beaded Bag is the result. I feel this is more accurate representation of what Hermione may have carried. I have written up my notes and you can download and make you own bag from my Ravelry store now! I just need to master the Undetectable Extension Charm now and I'll be set!


Sunday, January 20, 2019

Harry Potter Items

I have been enjoying creating a collection of Harry Potter themed bags and pouches lately. Joann Fabric and Crafts currently has some amazing licensed fabric available. The rest of the fabrics are an assortment that I have collected over the years.

Patches are from Amazon. The bracelets are made with ImpressArt stamps and blanks.

Bionic gear bag is top right. Rest are my own creation (personal design). All are quilted.


Wallet style bag. Can be used to store any small items. Quilted exterior. Personal design.


Gryffindor Pouch front. Personal design.

Gryffindor Pouch back. Personal design.


Pillowcase collection.


Quidditch and Marauder's Map Pouch 1 front. Personal design.

Quidditch and Marauder's Map Pouch 1 back. Personal design.


Quidditch and Newsprint Pouch front. Personal design.

Quidditch and Newsprint Pouch back. Personal design.

Quidditch and Newsprint Pouch front and inside. Personal design.


Ravenclaw cuffs. Impressart stamps and blanks.

Ravenclaw cuffs for me and gifts for friends. Impressart stamps and blanks.


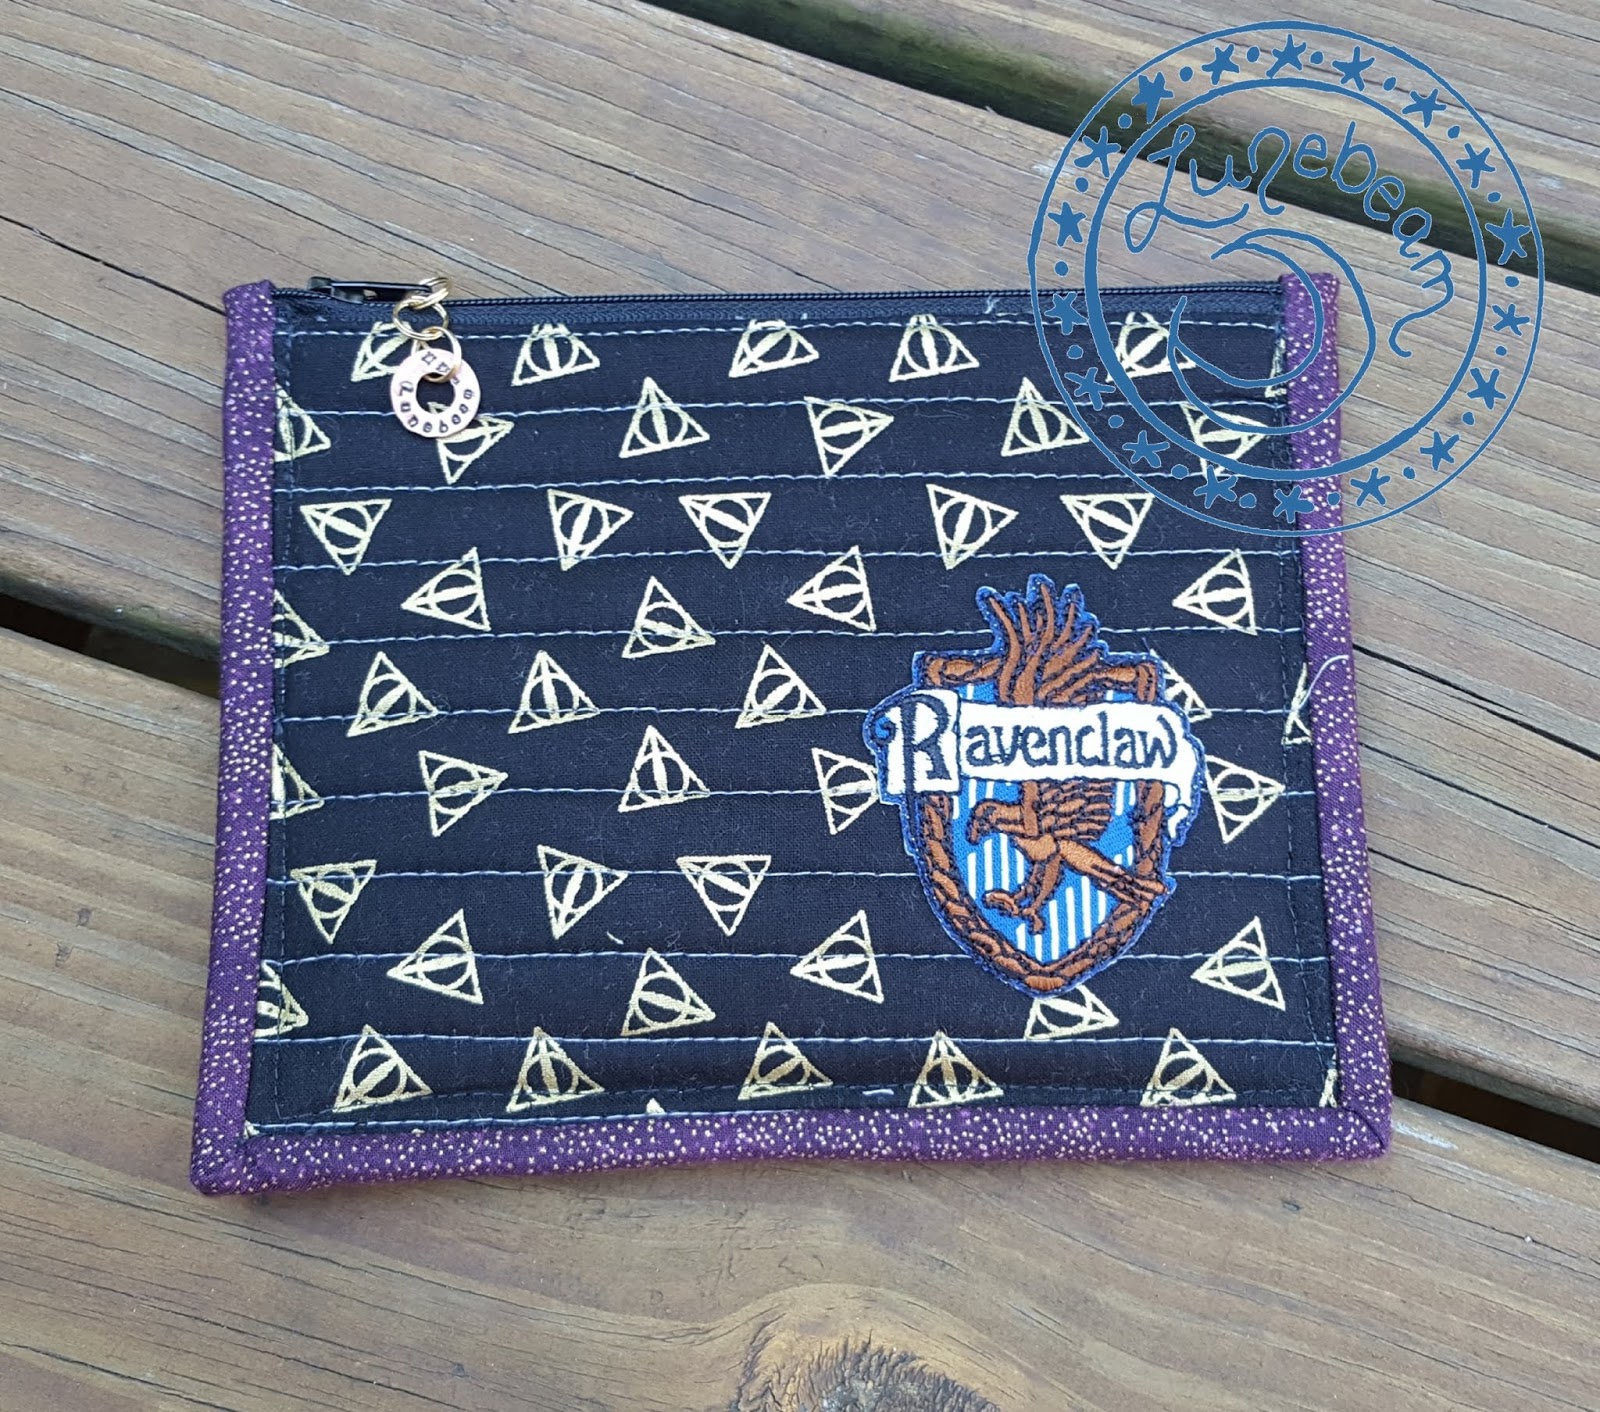
Ravenclaw pouch. Personal design.

Ravenclaw pouch. Personal design.

Tuesday, January 8, 2019

Campfire Tales Hat


I have been working on my knitting this past year, and I am so happy to announce my first original knitting pattern is now available for download. You can find it on Ravelry here!

I made this hat for my husband and thought others would enjoy it too, so I wrote up the pattern based on how I knit my husband's hat. I am so happy to see that others have been able to knit the hat too based off my pattern!

Mimbulus Mimbletonia and the Mandragora


Mimbulus Mimbletonia and the Mandragora (also known as the Mandrake) were both made at the Hoover Public Library. The Mandragora won 1st place in the recycled fandom prop building contest during the Scifi Fest in July 2018. Mimbulus Mimbletonia was made during the Glue Gun Gang program in September 2018 (theme was painted rock cactus gardens). The other painted rocks, like the owl, were also made then.

The Hoover Public Library has some amazing programs for adults year round. Their events can be found here.


Saturday, September 22, 2018

Color Pop Quilt Top


Color Pop is a new quilting pattern by CluckCluckSew. Quilt top made August 2018 using low volume neutrals and Tula Pink Stripes and Pom-poms. Kit available at In the Making.


Saturday, June 30, 2018

Double Point Needle Holder - Pattern Now Available!


I have had many dropped stitches while my needles were stored in my bag. As a result I knew I needed some way to keep my work safe while not in use. I tried the point protectors, but I found they often came off and posed a major choking hazard for children and pets. I knew there had to be a better solution! Thus, these double holder were born!

I have made these for knitting friends and they have been so popular that I decided to write up my pattern! You can find the PDF pattern on my PayHip website and on Craftsy!


Thank you for your support!


***Products made from this pattern my be sold in a small scale with acknowledgement to the pattern designer. Please include the following statement in the product description and with any materials attached to or sent with the finished product, "Double point needle holder pattern designed and sold by Lunebeam." This pattern may not be used for large-scale commercial production.***


Wednesday, May 9, 2018

Sweet Dreams Rainbow Blur Quilt Top


This is my finished quilt top of the Rainbow Blur Quilt, featuring Anna Maria Horner's Sweet Dreams fabric. The pattern is a free download and can be found here.

I love the Australia theme of the fabric... and the colors are amazing!


Direct PDF download here.

Saturday, April 7, 2018

Tatted Unicorn


As part of the Ravellenic Games in February 2018, I tatted a Unicorn. I used the pattern for the unicorn and Pegasus with alternative tail pattern from Flights of Fantasy - Tatting Patterns Inspired by Myth and Legend by Martha Ess.

Ravenclaw Bag


To go with my Hogwarts collection, I wanted to make a Ravenclaw theme bag. This is a very large quilted tote bag. I didn't intend for it to be so big, but I got a little carried away designing the panels. I couldn't bear to cut any off, so it's just a super large tote bag!


I have really been enjoying all the recent Harry Potter fabrics that have come on the market too! The inside liner is a Ravenclaw fabric I found at Joann's. The outside fabrics are a variety of scraps from my scrap basket and some fabrics I have bought with Harry Potter themed projects in mind.


Saturday, March 31, 2018

Easter Quilt


I made this little quilt as a Spring/Easter quilt for my little one. The fabric is Daring Little Dickens by Moda. It was perfect for a child quilt!

It's a simple charm pack quilt with a border. It's the perfect size for a crib though!

Tatting

I have been learning to shuttle tat for a year or so now. I took a break and recently picked it back up. It seems much easier now than before. Anyway, here are some 2018 tatting projects:

Beaded earrings, pattern by Jennifer Williams at www.cariad-tatting.co.uk/. Direct link to PDF is here.

---


Clovers for the March tatting swap with The Greater Birmingham Fiber Guild.


Patterns (from left to right) are:


---


Tat-a-long project with The Greater Birmingham Fiber Guild called Rosaleen by tattingbythebay.blogspot.com, free PDF pattern can be found here)
Group progress shot on 2/10/2018


Round 3 of 4 done