Showing posts with label Finished Quilts. Show all posts
Monday, June 13, 2016
1600 Inch Quilt / Jelly Roll Race Quilt
This is the second post on the 1600 Inch Quilt. My post about the quilt top can be found here.
My 1600 Inch Quilt is now officially done! The binding was finished on May 24, 2016.
The backing of the quilt was made using Chipper by Tula Pink, just like the top. I used the chipmunk, Fox, and circle fabrics on the back. I love how back turned out and I feel like it is a second quilt!
The binding is also from Chipper and called Labyrinth.
Wednesday, March 30, 2016
Moda Love Quilt 2
This quilt was designed and made for a relative that has Stage 4 cancer. I was heartbroken to hear this sad news, and while there isn't much I can do, I thought a bright handmade quilt may help cheer her up. I wanted to make it lap sized so she could take it to her chemo appointments to keep her warm.
I think the first Moda Love quilt I made turned out beautifully so I was debating about making that quilt again or something different. In the end, the quilt I made was essentially a Moda Love quilt with some minor changes. The center unicorn piece is done using an 8.5" by 8.5" square and adding the purple onto it. Since I counted my diagonal seam allowance wrong, the block finished out at 7.5" by 7.5" (an inch too small). Thus, I added a one inch (cut 1.5") border of teal with gold around it. I'm using this teal for binding, so I like how it is echoed in the center. The rest of my changes are pretty easy to see. The Moda Love Pattern is free from Moda and can be found here (This quilt is the charm size).
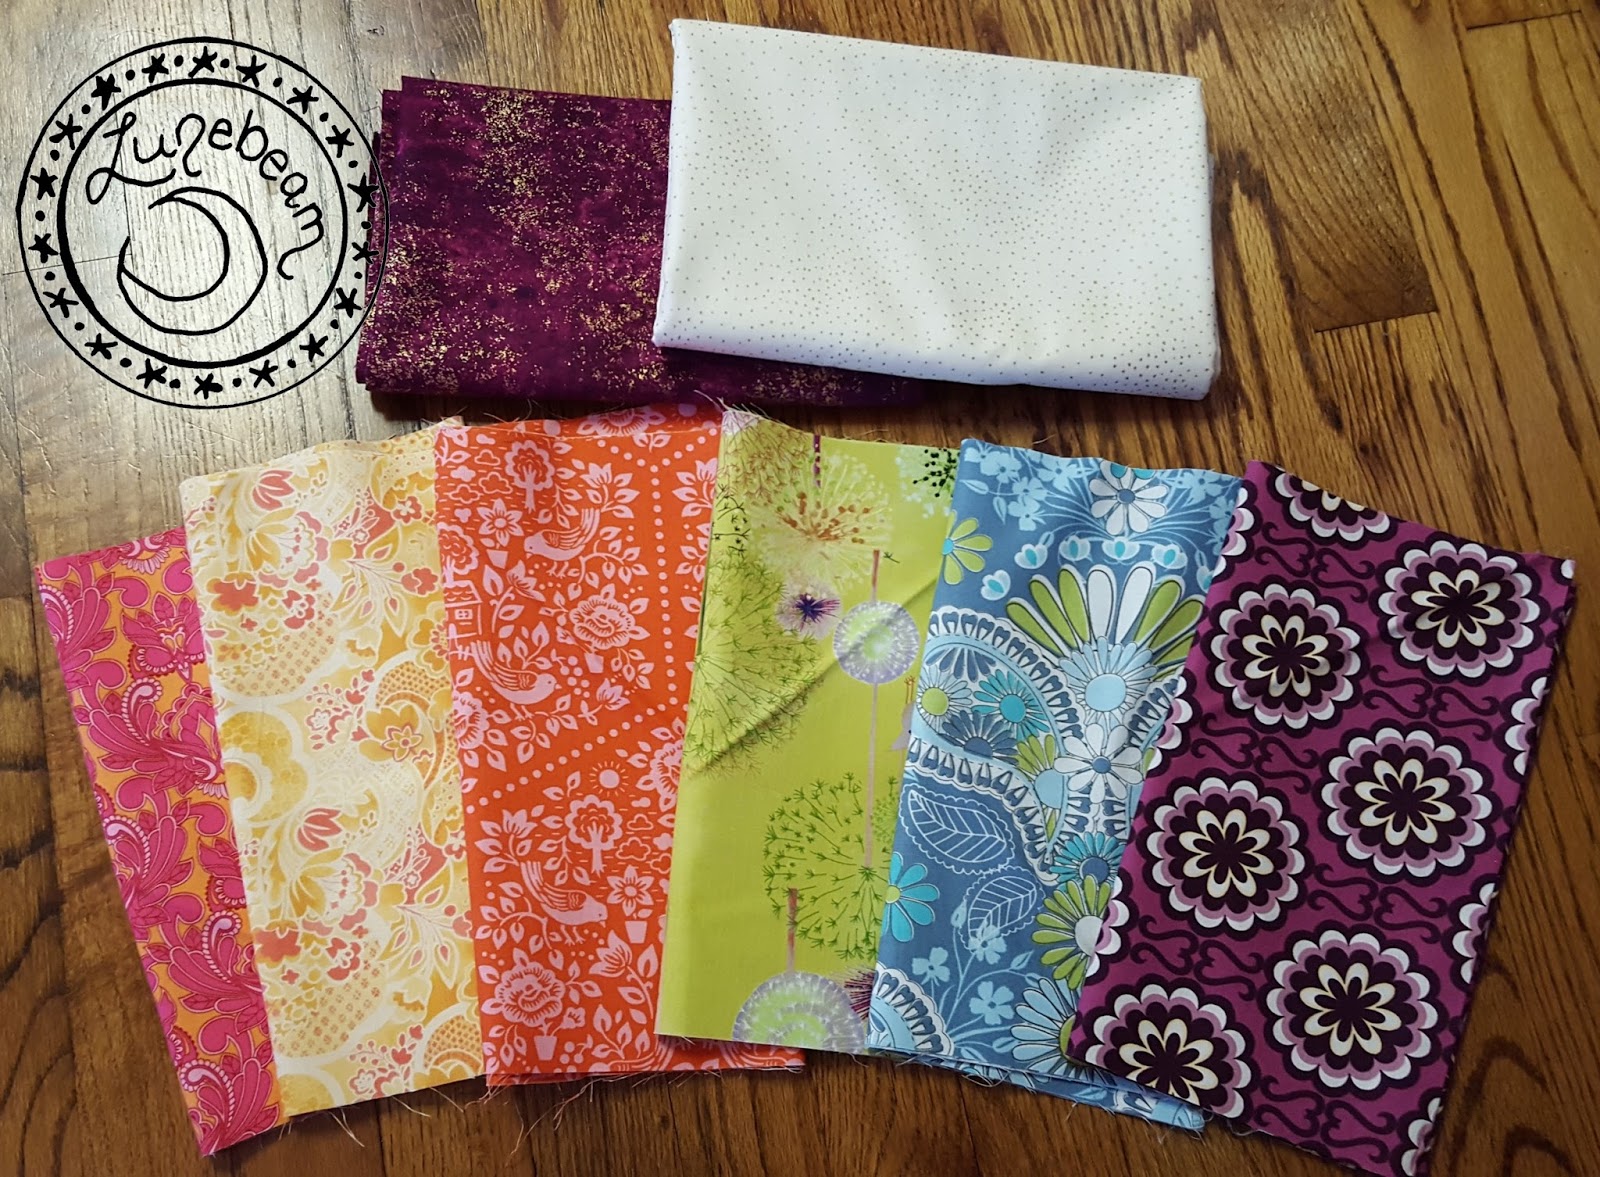
The fabrics for this quilt are a real assortment. Basically I went into a quilt shop I frequent called Thread Bear Fabrics and browsed. They have a huge selection so I had lots of options. I knew I wanted a rainbow of colors so I picked a fabric I liked, and then set to matching it. My husband is a great sport and helped me out through this process!
I ended up with the following (from left to right in the picture above):
For all of the 6 rainbow fabrics, I got a quarter of a yard cut. I then cut a 5 inch strip off of each color. Because Thread Bear often cuts generously, the remaining portion was anywhere from 4.5 to 6 inches. I put these aside for the backing. I then cut my 5 inch strip into 8, 5" by 5" squares. This gave me 48 charm size squares to work with. I had a good amount left over.
I also cut two 5" strips and one 4.5" strip from my cream with gold dot fabric. I then cut these down into squares.
I then used my notes to make my blocks accordingly. Please note I took extra care to ensure that all my directional fabrics were sewn so they all went in the same direction on the quilt. This will take some extra time and planning, but it would have bothered me if they went different directions.
The white used is actually a creme colored fabric with gold dots. I am in love with it. To me it is the perfect cream solid/blender. How does every shop not have bolts of this?!
The binding is a teal marble fabric with gold on it. It is also gorgeous. I guess I just really like the fabrics with the metallic sparkle to them.
For the backing, I used all my scraps from the rainbow fabrics. This wasn't quite enough, so I added a 5 inch strip of cream with gold dots. I didn't use a ruler to measure my backing before adding the cream and estimated how much cream to add. Turns out 5 inches of cream made the back exactly the same size as the top. I knew I could make this work with careful alignment, but next time I would use 6 or 7 inches.
I then did simple straight line quilting in all the joins of the fabrics. I took extra care not to go through any of the color pieces.
I think the back turned out beautifully and couldn't be happier with it. I really hope it brings a smile to her face!
The fabrics for this quilt are a real assortment. Basically I went into a quilt shop I frequent called Thread Bear Fabrics and browsed. They have a huge selection so I had lots of options. I knew I wanted a rainbow of colors so I picked a fabric I liked, and then set to matching it. My husband is a great sport and helped me out through this process!
![]() |
| The purple with gold in the top left was not actually used in this quilt. I went with the teal with gold instead (not shown). |
I ended up with the following (from left to right in the picture above):
- Tula Pink's Mini Owl from True Colors collection
- Chez Moi's Flower collage in buttercup from Mimi collection
- Heather Bailey's Summerhouse in red from Clementine collection
- Masha D'yans Dandelion from Forest Wonder collection
- Jeanean Morrison's Damask in blue from Lovelorn collection
- Art Gallery Fabric's Fancy Buttons Purple from Bespoken collection
The white with gold dots is LB Basics by Laurel Burch for Clothworks in the Basic Dot collection. The teal with gold is Artisan Spirit Shimmer by Deborah a Edwards of Northcott.
I also cut two 5" strips and one 4.5" strip from my cream with gold dot fabric. I then cut these down into squares.
![]() |
| The center block turned out a little smaller than expected, so I added a little border to it. The border is the same fabric as the binding. |
The white used is actually a creme colored fabric with gold dots. I am in love with it. To me it is the perfect cream solid/blender. How does every shop not have bolts of this?!
![]() |
| Debating what color to border the center block with and bind the quilt with. The teal on the right won. |
The binding is a teal marble fabric with gold on it. It is also gorgeous. I guess I just really like the fabrics with the metallic sparkle to them.
![]() |
| Ready for quilting now |
![]() |
| After quilting, before binding |
![]() |
| The quilt is finished. Before (left) and after (right) being washed. |
I think the back turned out beautifully and couldn't be happier with it. I really hope it brings a smile to her face!
![]() |
| The back of the quilt, without the label yet. |
![]() |
| The label I made for it, with names omitted |
![]() |
| This quilt seemed to compliment spring perfectly |
Made and quilted in March 2016. Finished size approximately 32" by 32".
Thursday, February 18, 2016
Moda Love Quilt
I was looking for a charm pack quilt to make as a baby gift and found the Moda Love Quilt (click for free PDF download link!). Since Moda makes most of the charm packs sold, their website is a great source of additional patterns that utilize all their precut shapes (eg charm packs, layer cakes, jelly rolls, etc).
If you Google or Instagram search for Moda Love Quilt, you'll be able to see lots of other designs based on the same pattern. This is really a great pattern that looks so different dependent on fabric choice and placement!
![]() |
| All my fabrics for the quilt top are ready to go! |
![]() |
| The steps of making the blocks. From left to right: 1. Drawing the diagonal and sewing on either side 2. Cutting along the diagonal, 3. Pressing open 4. Squaring up |
The charm pack size is perfect for a small baby blanket, so I'll be keeping this pattern in mind in future!
![]() |
| From quilted to getting the binding attached! |
Finished size: approximately 32 inches by 32 inches
Cut and Pieced: February 12, 2016
Quilted: February 12-13, 2016
Bound: February 14-15, 2016
Sunday, November 22, 2015
USA Quilt Finished
I finished my USA Map Quilt last week. I had to delay taking pictures though because of rain. My house doesn't have the best lighting so I always try to get pictures outside.
Anyway, I love how this quilt turned out! I free motioned quilted the whole thing on my small Brother CS6000i machine. I did a straight stitch around each state and then I did a zig zag stitch between each state to ensure the edges stay down.
It then took me a while to decide how to finish out the rest, but I decided on quilting in Central America and Canada the best I could. I have not washed the quilt yet, so you can still see a little bit of the pink water soluble pencil I used to sketch the outlines in. I am debating doing the country outlines in a dark blue to make them pop more, but I'm waiting to hang the quilt before I do anything else.
For the oceans I just did a free motion pattern to try to make it look like water and differentiate it from the land.
The batting I used is Warm and Plush crib sized batting (made by Warm and Natural). This batting lack scrim so you have make sure to heavily quilt it in. I like how it has a higher loft than the normal Warm and Natural and how it is 100% without anything added to it. I tend to get my batting at JoAnn Fabrics when their batting is 50% off. If I can time it right, they sometimes have batting 50% off and offer an additional 10-20% off with coupon! I haven't seen the Warm and Plush at any other stores and the package says it's a limited time buy which is unfortunate since I really like this batting.
For binding, I used the same fabric that I did the state of Georgia in. The fabric is Gardenvale by Jen Kingwell for Moda in Black Swan Spots. I love how it framed the quilt and further accented Georgia!
The backing I chose was Tula Pink's Lotus in Tomato. I chose this simply because I love this fabric. I intend to hang my USA quilt in the living room, so the backing really wouldn't be visible. Hence I just went with a fabric I just love!
In my last post about this quilt, In the Making had not published their pattern. Well, it is now available here!
Some extra shots of the quilt!
Part One of this post can be found here.
![]() |
| Sunset helped capture the quilting! |
Anyway, I love how this quilt turned out! I free motioned quilted the whole thing on my small Brother CS6000i machine. I did a straight stitch around each state and then I did a zig zag stitch between each state to ensure the edges stay down.
![]() |
| Prior to quilting the oceans and shown with indoor lighting. |
It then took me a while to decide how to finish out the rest, but I decided on quilting in Central America and Canada the best I could. I have not washed the quilt yet, so you can still see a little bit of the pink water soluble pencil I used to sketch the outlines in. I am debating doing the country outlines in a dark blue to make them pop more, but I'm waiting to hang the quilt before I do anything else.
For the oceans I just did a free motion pattern to try to make it look like water and differentiate it from the land.
![]() |
| Ready for binding! |
The batting I used is Warm and Plush crib sized batting (made by Warm and Natural). This batting lack scrim so you have make sure to heavily quilt it in. I like how it has a higher loft than the normal Warm and Natural and how it is 100% without anything added to it. I tend to get my batting at JoAnn Fabrics when their batting is 50% off. If I can time it right, they sometimes have batting 50% off and offer an additional 10-20% off with coupon! I haven't seen the Warm and Plush at any other stores and the package says it's a limited time buy which is unfortunate since I really like this batting.
For binding, I used the same fabric that I did the state of Georgia in. The fabric is Gardenvale by Jen Kingwell for Moda in Black Swan Spots. I love how it framed the quilt and further accented Georgia!
![]() |
| Love that backing! |
The backing I chose was Tula Pink's Lotus in Tomato. I chose this simply because I love this fabric. I intend to hang my USA quilt in the living room, so the backing really wouldn't be visible. Hence I just went with a fabric I just love!
In my last post about this quilt, In the Making had not published their pattern. Well, it is now available here!
Some extra shots of the quilt!
Part One of this post can be found here.
Friday, October 9, 2015
Halloween Quilt
My Halloween Quilt came about because I wanted to try a harder quilt, but I didn't want to invest too much time or money experimenting.
I had some Halloween themed fabric in the house. I had prior made a very simple blanket but never liked or used it (it also lacked batting), so I took this apart to get the candy corn and multicolored fabrics. The other Halloween prints were purchased at deep discount at my local Hancock fabrics over the summer of 2015. I then added a black and yellow/orange I had to complete the color collection. I didn’t want to spend too much money on this quilt since it was my first time using a rotary cutter on my own. I knew there would be some mistakes and I would hate to ruin some of my nicer fabrics. I also did not follow a set pattern, rather I just made one on graph paper and adding ¼ inch seam allowance to pieces. The block structures are basic courthouse steps style.I did my own quilting using straight lines around each square. Had it been a larger quilt, I really would have struggled turning the quilt around in my small home sewing machine.
I love the backing of this quilt. It is Halloween Dogs in Costume from Hancock fabrics. I’m a dog person, so the dogs in costume was right up my alley! The binding is a Halloween Spooky Prints Fabric-Black Cats from JoAnn Fabrics.
This quilt has now become my cat's favorite. I guess its fitting since she's an all black kitty.
Thursday, October 8, 2015
Summer Quilting
Simple Baby Quilt
This quilt was my reintroduction to sewing after a bit of
time off. My local quilt shop was offering classes over summer, so I took
advantage of this opportunity and learned how to properly make a quilt. Prior
to this, most of my quilts were not bound but finished by inverting the
fabrics. I also tended not to quilt them as much as I should have resulting in
fabric shifting.
The class allowed me to the make the quilt top in one session. There was a follow up session to complete the quilt sandwich and binding.
This baby quilt was made using one Persimmon by Basic Grey for Moda
charm pack and matching binding and backing fabric from the line. I really love how this color palette works together. It was also a one of the few charm packs I saw that was more gender neutral. I am not sure what my plans are for this quilt yet, so I'm just keeping it for myself for now.
![]() |
| The layout plan for the quilt |
Subscribe to:
Posts (Atom)